What is 192.168.1.1
192.168.1.1 is what is known as a default private IP address. Manufacturers such as TP-Link, Linksys, and Asus assign it to all routers they produce and release on the market. The 192.168.1.1 IP address plays two crucial roles within the home and office wireless networks. It is the foundation on which your wireless internet connection is built. Devices you connect to your WiFi use it to communicate with the router and between each other via the netmask. The local IP also gives you access to the router’s admin panel. From there, you can tune up your wifi, make the network more secure and personalize it to your liking.
What is the default username and password for 192.168.1.1
To gain access to the full functionality of your router, you will need to use the username and password for the admin panel. These might have been already set by your Internet Service Provider. Or, they can be the default logins set by the manufacturer. To learn the default username and password for your gateway IP you can:
- Look in the instruction manual that came with the device
- Look online on the manufacturer’s website
- Check the label on the back of the device itself.
If the default logins for 192.168.1.1 don’t work, and you have no way of learning what the new ones are, you can factory reset your router. For that purpose, you will have to press the reset button on the back of the device and hold it until the lights on the front start blinking. Typically it takes around 15 seconds. Wait until the device boots up and try logging into the admin panel. Once in there, you can set up new logins from the Router Settings menu.
How to Login at your Router Using 192.168.1.1
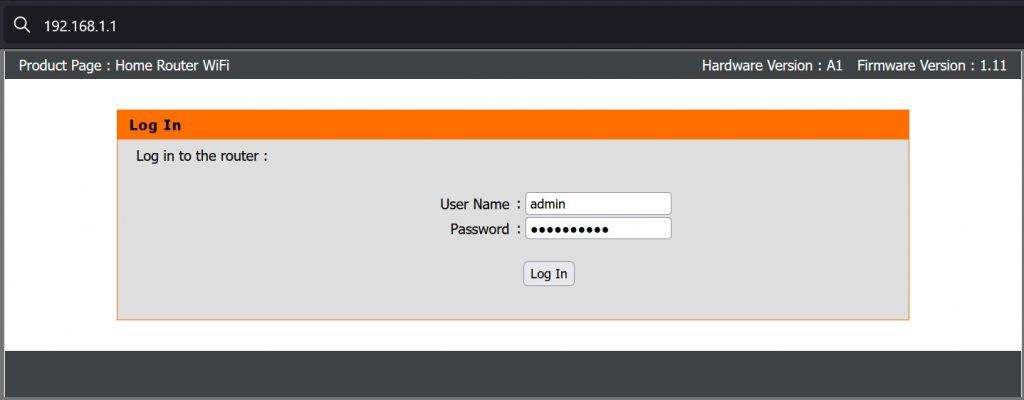
Once you have the default logins for 192.168.1.1 or the ones that your ISP has set, you can proceed to log into the IP. For that purpose, fire up your laptop and make sure you are connected to the right wireless network. From there on, you can follow these easy steps:
- Open an internet browser of your choice.
- Type http:// 192.168.1.1 or https:// 192.168.1.1 in the address bar.
- Hit enter and you will see the login page for the admin panel.
- Enter the default or updated logins.
It is highly recommended that you connect your laptop or the desktop computer you are using directly to the router via an Ethernet cable while you are going through this procedure. In that way, you will ensure an interrupted connection. If you don’t reach the login screen by using the 192.168.1.1 IP, that might mean someone has changed the local IP. You can factory reset the router to bring it back to default settings.
How to Configure and Use 192.168.1.1
Once inside the admin panel, you can proceed to configure the settings of your 192.168.1.1 network. There are quite a few options to choose from, but it is typically advised that you start with the following two:
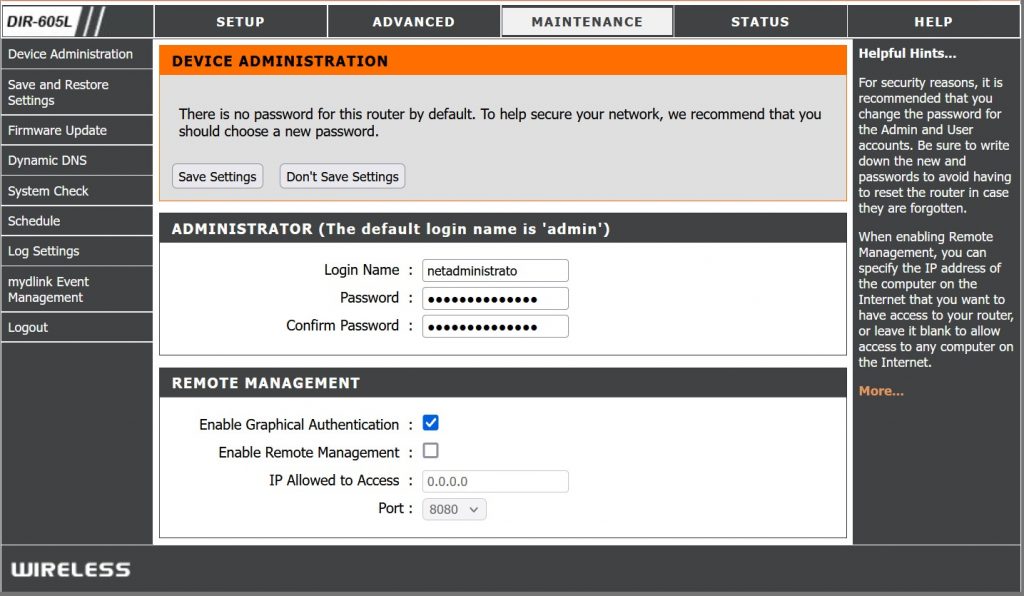
- Go to the Network settings tab. There you can update the logins for the 192.168.1.1 IP. It is highly advisable that you do that in case you are still using the manufacturer-assigned default logins. Anyone can use those to login into your router while connected to its wifi. In that way, they can take full control of your network.
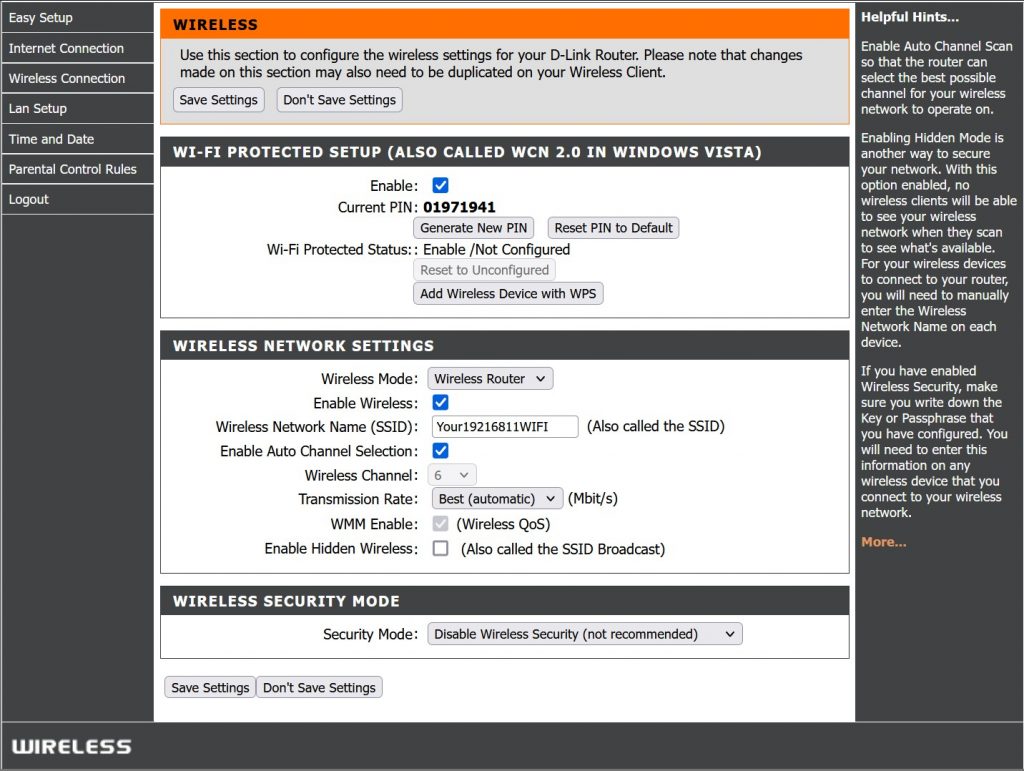
- In the Wireless Settings tab, you are going to find the Service Set Identifier (SSID) field. That is the name of your wireless network. By default, it will be set to the brand and model of your router. Change it to anything you’d like to add a personal touch to your wifi. Under the SSID field, you can set up a password for the network as well.